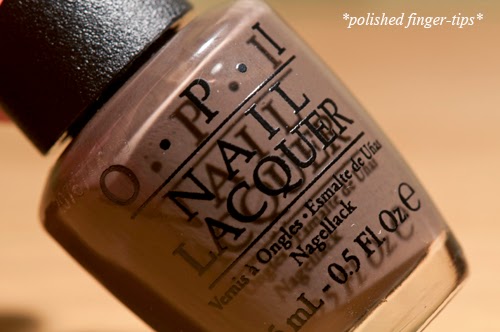
Showing posts with label OPI. Show all posts

Thursday, 22 January 2015

Snowflake Foil Decals - Born Pretty Store


Hello ladies!  Today I'm reviewing a nail art product, sent to me by Born Pretty Store who sell a wide range of Nail Art supplies.  The product they sent me are these super pretty ultra-thin gold foil 3D nail decals (http://www.bornprettystore.com/30pcsset-ultrathin-snowflake-deer-design-charming-nail-decoration-p-16678.html).  I enjoyed playing with these and learned some handy tips for application that I'll share with you.

Snowflake decals from Born Pretty Store

First, let's get some details.  These decals are 4mm wide, and made of ultra-thin gold foil (the bronze colour you see below is the back).  These come in a small resealable plastic baggy which keeps them nice and flat.  Because of their thin profile, they are fairly bendy to wrap to the shape of your nail. Pictured here I'm wearing them with A-England 'Camelot' (black) and OPI 'From Me to Q' (red) to show you the contrast, and a generous coat of Essie 'Good to Go' topcoat to seal them in.

Snowflake decals from Born Pretty Store

How to Apply:

you will need: your decals, your chosen colour polish, a good topcoat, a blunt pointy object (like a dotting tool, I used a plastic headed pin), and a little dish of water

Start by applying your usual base coat and your chosen colour. When your final colour coat is still fairly wet, wet the tip of your pointy object and tap it onto the decal to pick it up.  Gently deposit the decal on your nail, but don't push down much.  When your colour is almost dry, just slightly tacky, you can gently use your blunt pointy tool to press around the edges of the decal to bend them to the shape of your nail and stick them to the polish.  Be careful though - if you do this too soon, your colour will pool up and flood over the top of the decal.  When you're happy with the shape, apply a thick layer of topcoat to seal it.

I found out by trial and error the best way to apply these, but I have left the errors in my picture so you can learn from my mistakes!  In the picture below you can see that I didn't wait until my colour was dry enough before applying topcoat and the colour smeared across the decal.  If you can, use a non-smearing topcoat.

Snowflake decals from Born Pretty Store atop OPI 'From Me to Q'

In this picture you can see that I didn't press firmly enough on the edges to stick them into the base polish, as a result the decal is not sitting flat against the nail.  You might have to try a few times to find exactly the right level of tacky-ness to stick the decal without flooding it.

Snowflake decals from Born Pretty Store atop A England 'Camelot'


Conclusions

This is the first time I have tried 3D decals, and they make an easy pretty effect for those of us that can't paint a freehand Picasso on our nails.  Personally I would prefer a smaller decal, so that I could fit several on each nail.  Application was easy when I got the hang of it, but I did find that even through thick topcoat the sharp edges still peeked out a tiny bit, which was enough for them to get caught on my clothing and to feel a bit scratchy.  I think this might be due to the design - the snowflake has very spiky edges, perhaps a smoother edged decal would not catch as much.

Shopping at Born Pretty

These products were sent to me for review, but I have previously purchased nail art supplies from BPS.  They have a massive selection of nail art supplies for really low prices (typically just a few dollars), and they provide free worldwide shipping.  The only downside of that is that shipping time can be quite long, my order took about 4 weeks to arrive which I gather from nail forums is fairly typical.  So, BPS is a great place to grab a bargain, but be sure to order well in advance of when you might need something,

BPS have kindly provided me with a discount code PFT10K31 for all my readers to receive 10% off.  You can use the code as many times as you like.

Born Pretty Store Discount Coupon


Saturday, 25 October 2014

Sea You in Hollywood by OPI

Hello ladies! Tonight I'm shopping my stash for a short and sweet post.  This is 'Sea You in Hollywood' by OPI.  This is a beautiful cerulean blue foil polish that is really pretty to wear.  This was apparently a QVC exclusive shade, but I picked mine up in T K Maxx in a pack of 3 for £10.  This is two coats with NE base and HK girl topcoat.  No issues to report quality wise, and I got a CRAZY weartime out of this...a whole week with no chips.  That's the dream ain't it?

OPI Sea You in Hollywood
OPI Sea You in Hollywood - natural light
Hooray for T K Maxx! It's always worth a visit, and my local one has recently really expanded the brands it carries, they now have Spa Ritual, CND, tons of Ciate and loads more and all for silly prices.  What's not to love?

Wednesday, 15 October 2014

Top Trumps : Battle of the Top Coats

Hello ladies!  Today's post is something a little different.  I'm going to talk about the unsung hero or ultimate nemesis of every mani : the topcoat.  Like base, this is something that is likely to be present in every mani that you wear.  So if we spend so much time and thought on the shades we buy, what would be the point if we cover it with a crappy topcoat?


 If you're not convinced of the use for topcoat then you're not alone. Personally I never go without it, for two reasons - extended wear time, and shine.  I have never got on board with the textured or matte trends, I want my mani to be so shiny that I can see my face in it, and for that we need serious topcoat.  I'm also a busy girl, so I want my mani rock solid in minimal time too.  Over the years I've flirted with many brands, perhaps my longest held darling was Seche Vite.  In the end it was a bitter split, and I went off in search of the perfect topcoat to replace it.  In this post I'm going to talk about several topcoats that I tried recently.

Seche Vite

On the blogosphere SV is one of the most popular choices for a rock hard mani, superfast dry time, and bonkers shine.  It is also equally well known for its foibles - by the time you reach halfway through the bottle it will become a gloopy gluey mess that will give you awful tip shrinkage and apply like a pig.  This problem is so well known that SV themselves released a product called 'Seche Restore', which is basically Toluene with a dropper, to mix with your SV to make it liquid again.  I know people that have had success with this, but I personally haven't.  My SV went pink, and stayed gloopy.  The other fact that works against SV is that it smells god awful, and the reason for that is that it's stuffed with every nasty ass chemical that all other polish brands advertise they're 'free' from.  Yes ladies it turns out that rapid dry time, solid finish and shine are all the byproducts of the nasty chemicals.  So let's take it as read that SV when it's behaving will give you undoubtedly the best top coat money can buy.  It just might also give you a terrible deformity.

CG Howl you Doing - SV tip shrink
Don't Get Your Tips out in Public!
Seche Vite tip shrink at its worst (over China Glaze 'Howl You Doin?')
In the end I just couldn't stand the tip shrinkage any more.  On bad days it was up to 2mm, and really then what is the point?  So I searched for a successor and found...

HK Girl by Glisten and Glow

HK Girl by Glisten and Glow
HK Girl caused quite a stir when it hit the market.  Bloggers worldwide reported that this was SV without the Achilles heel.  They said it's just as shiny, just as fast drying, 2-free, and best of all it will work that way right to the last drop.  I was sold, I grabbed a bottle right away and used it....until it was about half way through, and then instead of going gloopy, or tip-shrink, it went HAIRY.  What the hell?  How can nail polish be hairy?  What happened to mine is that it forms really fine filaments, like spider's web, that float out from the end of the brush and are highly attracted to the sticky polish on your fingers.  This leaves little fine hairs all over your mani.  The hairs form every time you dip the brush in the bottle, and I couldn't succeed in wiping them off before the brush went near my nails.  It was infuriating.  This might not have some of SV's worst traits, but the hairy problem made me madder than anything SV ever did.


HK Girl by Glisten and Glow
Hairy Polish! HK Girl is a bad bad girl indeed.
Also, HK Girl smells exactly the same as SV.  I challenge the idea that it's full of kittens and hugs instead of nasty chemicals.  It might be 2-free, but rest assured there's some nasty shit in there too.

HK Girl by Glisten and Glow
HK Girl on a good day, lovely shine, but it will only last half a bottle
(atop Liquid Sky Lacquer 'Strawberry Mojito')
So although I respect the views of my fellow bloggers, there's no way I can recommend this.  It's maddening.  So the search continued and I went back to my stash and found....

Top Coat by OPI

OPI Top Coat - disaster

Good lord this is AWFUL! My bottle was a little on the elderly side, so perhaps a bit thicker than a fresh bottle would be, which made application a sticky tricky mess.  It bubbles and pits something terrible - my mani looked like I'd gotten the pox. 

OPI Top Coat - disaster
Pox! Nail bubbles and pits with OPI topcoat.  Urgh!
But by far the biggest issue with this top coat is that IT DOESN'T DRY.  Now I may have been spoiled in the past by the dry time of SV and HK Girl, but when I say it doesn't dry I mean that I polished my nails two hours before bed, and I woke up to sheet wrinkles in my nails.  So it was still squishy hours after application.  There is just no way that's practical for anyone.  Avoid like the plague.  It's 3-free but who cares.

OPI Top Coat - disaster
After two hours of dry time, this is what happened when I went to bed...
(Disastrous OPI topcoat atop OPI 'Embarca Dare Ya')
I then was kindly leant a couple to try by the lovely Hannah.  In true scientific fashion I conducted an experiment....

CND Super Shiny vs. Essie Good to Go

CND Super Shiny and Essie Good to Go
For this test I used the same base coat, and the same shade (see recent post Human Nature by CbL).  On my left had I used the CND, on my right the Essie.  Since these were both by far the best candidates I'll give you some more detail on these...

CND Super Shiny
CND Super Shiny - notice the sheet dents on the middle finger
(atop Colors by Llarowe 'Human Nature')
The CND has a fantastic shine, and bizarrely almost no smell.  You need to stick your nose right close to the bottle to smell this at all.  It has a really nice sturdy bottle, easy grip long handle, and an excellent brush.  All important points given that you will mostly handle this product with wet nails.  I had no shrinkage, no 'pooling' of thick formula (formula was a nice thin consistency) and fast drying.  However, it did dent slightly 40mins after application, and I did wake up to sheet marks (although I went to bed less than an hour after application).  

Essie Good to Go
Essie Good to Go - no dents at all
The Essie had a slightly thicker formula than the CND, and the brush isn't as good.  The shorter handle is a bit fiddlier to use than the CND one, and the smell is stronger (although still fairly light compared to the other topcoats in this post).  The level of shine was, to my eye, identical (and I really looked hard, under all lighting conditions).  Dry time was also very similar.  The big plus with the Essie is that there was no denting or sheet marks.

Essie Good to Go and CND Super Shiny
Spot the Difference?
I asked several people to look at my nails and pick the topcoat they preferred.  They all picked the CND.  Reasons given were that it looked shinier (I'm convinced it didn't) and interestingly that it made the colour of the nail polish more 'vibrant'.  I really puzzled over this one too.  I think there is something in that.  The CND has a purple-ish tint to it, which they say is a UV protector coat, and I think that this did have an effect on the perceived colour of the polish underneath, I think it made it slightly darker.  It reminded me of the effect that a polarising filter has on a camera lens - by reducing reflective glare colours seem more vibrant.  But this was a really tough call, so unless you stare at your nails under a microscope all day long (hey I'm not judging) this is likely not something you'd notice.  Both topcoats also lasted EXACTLY the same time before chipping - they both lasted a whole week, and chipped within minutes of each other.  Both polishes are 3-free, and their pleasant smells would back that up.  Given this, I think the finish of both and their dry time are fantastic.  SV-like results but without the risk of growing an 11th finger...

And the Winner IS....

In the end I went with the Essie, due to the lack of dents. I've been using it for a while now and I'm delighted with the results. Great shine, great weartime, fast drying and so far no downsides.  I will be interested to see how it fares as the bottle wears down, so I'll follow this up if I find a gotcha later.  I also really liked the CND.  I liked the feel of the bottle, the ease of the applicator, the light smell, I think I'm likely to get a bottle of this in future too.

So there you have it.  I hope my many spoiled mani's will be of some use to you!

Where to buy/What to pay

Seche Vite is widely available, shop around for bargains.  I bought mine from QVC, Amazon and Nail Polish Direct. If you look hard you can usually find it for £5-6 a bottle.  HK Girl is sold on Rainbow Connection for a similar price to SV.  OPI topcoat is available from all OPI retailers like Sally's, Lena White, and is probably around £10-11.  CND is available from Amazon for about £8.  I bought my Essie from Boots for £8.95.

Friday, 10 October 2014

Eurso Euro by OPI, with Ozotic 528 accent

Hello ladies!   After my recent disappointment with "Do You Have This Colour in Stock-Holm" from OPI's latest Fall collection I was reminded of a much better colour - "Eurso Euro" from the Spring 2013 Euro Centrale collection.  I was initially convinced that '...Stockholm' would be a dupe for 'Euro' but as my previous post shows this isn't the case.  It did mean that I then had both shades side by side and could be reminded what a great shade Euro is (and also that I've had the swatch pics since last Christmas...sigh).

OPI Eurso Euro and Ozotic 528 - artificial light
Ahhh now isn't that better? '..Euro' is a rich, deeply pigmented,  navy crème and unlike '..Stockholm' it doesn't apply like a pig.  It's a brilliant shade for Fall, so it's quite a mystery for a Spring collection but hey, I'm not complaining! Pictured here I'm wearing two easy coats under SV topcoat.  On my ring finger I used a single coat of my precious (and now sadly discontinued) Ozotic 528.  These photos are almost a year old now, and I still thought accent nails were really cool at the time.  It's like nail art for the lazy, you only have to do one finger and you don't have to worry about symmetry! Does anyone even do this anymore? Now it seems stamping is a far more popular choice for nail art that doesn't take a fine arts degree in painting to achieve.

OPI Eurso Euro and Ozotic 528 - natural light
OPI Eurso Euro and Ozotic 528 - natural (indirect) light
Ozotic 528 is a multichrome glitter that is really gorgeous, and sadly didn't go with 'Euro' quite so well as I imagined from the bottle.  I'll have a separate post for this later, although knowing me it'll probably take me a year to get round to it...

OPI Eurso Euro and Ozotic 528 - artificial light
Ozotic 528 accent nail atop OPI Eurso Euro
So, if you're looking for an ideal Fall colour and a really classic shade of blue, then I'd say look no further.  You'll probably even get this for a good price compared to the new Nordic collection since it's a bit older, but a shade like this isn't going to go out of style (unlike my nail art...sigh).

Thursday, 9 October 2014

Do You Have This Colour in Stock-holm? OPI Nordic Collection

Hello ladies!  Tonight I have the second polish that I picked out from OPI's Fall 2014 "Nordic" collection...the wittily titled "Do You Have This Colour in Stock-Holm" (DYHTCIS).  Like it's collection mate "How Great is Your Dane", DYHTCIS is a saturated crème polish and a wonderful shade for Fall:

Do You Have this Colour in Stockholm - by OPI - artificial light

However, that's the end of the praise that I'm willing to give this shade.  At least in my bottle, I found the formula of this to be really crappy.  The first coat went on horribly streaky, the second managed to be lumpy, and the third (on the nails that needed it) was a haphazard splodge job to try to even the damn thing out.  As you can see from the translucent tips on my ring/pinkie even this wasn't enough to get the coverage right everywhere.  I don't actually think I've ever had an OPI with a formula this difficult.  It also smelled quite strongly.  Whatever they have put in this to make it hold this much pigment I'd guess is the cause of the smell and application issues.


Do You Have this Colour in Stockholm - by OPI - artificial light

Onto the colour...the tricky tricky colour.  In the bottle (see below) and in all the online swatches I've seen, this shade clearly looks like a violet crème.  On my nails (see above) this reads much more like a blue.  I'd describe it as a royal blue, with a shot of violet.  The picture above is taken in my halogen kitchen lighting and shoes this blue/violet quite well although under the bright light this looks brighter than it does most of the time.  The picture at the very top of this post is perhaps the most accurate reflection of this shade IRL, even then I'd say it looks darker to me when it's not posed under a lamp!  So to summarise, this colour was not what I was expecting, and is fairly blah compared to the swatches I'd seen.

Do You Have this Colour in Stockholm - by OPI - artificial light

I am a huge OPI fan, as my stash list shows it's by far the most represented brand in my collection.  I love the witty names, and (usually) the quality.  But my big gripe with OPI is how much they 'recycle' their colours.  If you collect OPI over the course of a few years as I have, then you start to see the same shades coming around again with different names and subtlely different finishes.  So, since it's the first thing I want to know when I look for new OPI, I pulled out the shades I owned that I thought most closely matched this one: "Tomorrow Never Dies" from the Bond themed Holiday 2012 collection, and "Eurso Euro" from the Spring 2013 Euro Central collection:

Comparison - Tomorrow Never Dies, Do You Have this Colour in Stock-holm and Eurso Euro by OPI
Comparison (L-R) - Tomorrow Never Dies, Do You Have this Colour in Stock-holm and Eurso Euro
As these bottle shots show, there's no dupes here: 'Tomorrow' is metallic finish and on the blue side of blurple, 'Euro' is a definite navy crème without a hint of purple, and by comparison 'DYHTCIS' looks really purple.  Since I put this polish on it has reminded me so strongly of 'Euro' to wear that I was convinced these would be dupes, to convince myself I took a photo of my 'DYHTCIS' mani holding the 'Euro' bottle:

Comparison - Do You Have this Colour in Stock-holm and Eurso Euro by OPI
Comparison: "DYHTCIS' on the nails, Eurso Euro in the bottle
Yup, I'm finally convinced, 'DYHTCIS' is a purple.  But it's like when you go out to buy a pair of black trousers, and you can't tell if you picked up black or navy until you hold them against something black for comparison.  And for my money, that just ain't purple enough.

In fact this whole episode has really just reminded me of what a great shade Eurso Euro is, so I'm going to blog that one next.

In conclusion, I don't feel I can recommend 'DYHTCIS'.  Even if you are looking for a fall shade that's more navy than it is purple, the formula was just so nasty.  It even made me wonder whether I had gotten a fake (even though I used a reputable internet supplier, who I'm not going to name for this reason), but having checked all the markers on the bottle it does seem to be the genuine article.

So for me, by far the best of the Nordic pair was "How Great is Your Dane?"

Sunday, 5 October 2014

How Great is Your Dane? OPI Nordic Collection

Hello lovelies :) Today I have a polish from this year's "Nordic" Fall collection by OPI - How Great is Your Dane? Pictured here I'm wearing three coats with NE base and Essie Good to Go to top it off.  This would have been fine with an easy two coats, but I'm a spaz and made a mess that needed a second coat to fix.


This chocolaty beauty is a silky smooth crème with a colour that's tricky to describe, it is predominantly brown but with strong grey tones.  I'm not sure exactly what I'd call it, a cool-toned brown? Chocolate Clay? I'm not sure, so I'll stick with gorgeous. The tone is super flattering, and the overall effect is very elegant.


In the bottle this looks like a pale brown, close to the colour of the milk in your coco-pops, but on the nail is comes out darker and with more of a wet-clay effect.  It's definitely one of those polishes that looks a lot nicer on the nail than you'd guess from the bottle.  I'm in love. I'm still a relatively nude newbie, I had no idea that I would like shades like this so much on the nail.  I feel like such a grown up.


Formula is the usual high quality you'd expect from OPI, no issues to report there.  The brush seemed shorter to me than I expect from OPI - have they changed that? I haven't heard any word on the grapevine about a change to the pro-wide.  Perhaps I'm imagining things, sometimes the fumes get to me...

Friday, 15 August 2014

OPI Glitter Off...update

I have just discovered an even easier way to remove a mani that uses OPI Glitter OFF...it turns out that if you stay in the shower long enough for your fingers to wrinkle that your polish slides right off!

I was unhappy to discover this because I was washing my hair and not planning to remove my polish! I stayed in the shower just a little too long trying to warm up after a long run and my mani paid the price.  On the plus side, for all those ladies that struggled removing this stuff I recommend doing it after a shower :-)

Friday, 23 May 2014

Pretty Serious "Bloody Bride" and review of OPI Glitter OFF! base coat

Hello ladies!  Today I have a dual purpose review for you - "Bloody Bride" a gorgeous glitter polish from Pretty Serious, and a first test of the new OPI "Glitter OFF!" base coat.

I have only worn Bloody Bride once before this, and removal was so unbelievably god-awful that I vowed never to wear it again.  I used the foil method, I used pure acetone, I buffed, scrubbed and basically destroyed my nails to remove this stuff the first time round.  I have never had another glitter polish this bad for removal.  So when I got my mitts on a bottle of Glitter OFF this seemed like the ideal test case.  If it could make this polish wearable it would be worth it.  I'll start with a review of Bloody Bride and then the cover the base coat separately...OK on with the show!

Pretty Serious "Bloody Bride" - artificial lighting
Bloody Bride was a special project for Kaz - the woman in charge of the Australian brand 'Pretty Serious'.  This was the polish she created to wear on her own wedding day, at her horror themed wedding.  It was one of two polishes in the "Till Death Do Us Party" collection (Gruesome Groom was the zombie green partner to this).  It's a densely packed glitter polish, with holo particles aplenty, suspended in a suitably bloody jelly base.  Pictured here I'm wearing two coats atop the GlitterOFF base and beneath a thick coat of HK Girl topcoat.

Pretty Serious "Bloody Bride" - artificial lighting
Bloody Bride
In some ways I find this quite a disappointing polish.  Application is terrible, it really lives up to its bloody name as it applies like clotted blood.  The dense glitter makes it very clumpy, streaky as hell, and suffers from the classic 'clump and drag' effect.  Applying two thick coats and waiting for the first to dry completely allowed for a smooth finish, but took patience.  I really like the colour of this when it's on, but it's one of those polishes that looks nothing like it does in the bottle.  Look at the shot below - see all those lovely rainbow holo sparkly bits in the bottle? See them on the nail? Nope!  The thick jelly base covers the sparkly nature of the particles that are contained within, which is a real shame.
Pretty Serious "Bloody Bride" - artificial lighting
Disappointingly the holo particles in the bottle don't translate onto the nail
On the nail this polish has some similarity to Toggle to the Top by Essie, which you would not expect from a bottle comparison (pic of this comparison is on the Toggle...review, link above).  The difference is that the particles in the Bloody Bride are a lot larger, so the effect is less subtle than in the Essie, but the base colours and overall effect are quite similar.  I'd recommend getting the Essie instead - it's cheaper (£7.99 vs £9.50), more easily found (in Boots, Bloody Bride is often out of stock in the UK), and most importantly its easy to remove!

So, on the topic of removal, let's move on to the OPI base coat review...

OPI GlitterOFF is almost certainly just watered down PVA glue.  There really is no mistaking that smell as soon as you open the bottle.  The blogosphere has long talked of mixing your own, which requires an empty bottle that I've never had (really who finishes their polish? Who could be bothered to clean out a bottle?) so I'm happy to go with the commercial product but I'd put money on them being the same thing.


The first thing I noticed on applying this is that it immediately shrank significantly from the edges of the nail.  In other reviews I've heard people complain that when peeling off their polish they found it firmly stuck down at the end of the nail and I wonder if this could be the cause.  The bottle says to use a single thin coat, I used two coats in a effort to get more edge coverage (and on the theory that the coat would adhere better to itself than to my nail plate).  This did help, but as you can see in this photo there is still some tip shrink.


The other thing that I noticed about this base is that my usual clean up method (of a small brush dipped in pure acetone and run round the edges of the nail) didn't dissolve the base coat.  This left me with the unsightly edge effect you see in the picture above.  I was reluctant to try peeling this bit off in case it took the polish with it.

As for wear time and durability, I was happy to discover it was the same as I'd expect from a regular base coat.  Since this is a peel-off product I thought it would push away from the tips quite easily but I was pleased to find this wasn't true.  When it came to removal I used a wooden orange cuticle stick, and pushed from the middle at the cuticle end upwards.  I had to apply a reasonable amount of force to push the polish off, which might have been due to using two coats. On most nails the polish split into fragments that were pushed off separately.  I didn't have any issues getting it off the end of the nail, so I think my double coat method really helped for this.

Below (top) is a picture of my nails straight after the orange stick removal.  You can see that there is a lot of residue on my nails, and quite a yellowy effect.  I was really worried that this flaky stuff was my nails and not the base coat.  I spent some time with nail polish remover, rubbing at the residue, and then gently buffed my nails.  The picture in the middle shows how my nails looked after this - most of the residue was gone, and most of the yellowing went too.  HOWEVER I'm not convinced that my nail plate wasn't damaged.  I think a small amount of this peeling was actually from the surface of my nail (from the way that it took off a thin strip when I peeled it off.  Had it been PVA it should have just been the PVA that came off).


If you've reached the end of this mahoosive entry - well done!  To sum up, here's what I learned: Bloody Bride is a good looking polish, but I don't feel its worth the hassle (or the pricetag), if you like the effect then get Essie "Toggle to the Top" instead.  The OPI base coat certainly makes removal a lot easier, but I'm not convinced you're not doing a small amount of damage to your nails when you use it.  I will use the OPI base again, but I don't think I'll use glitter polishes much more often for owning it.

I bought my bottle of Bloody Bride from the lovely Sally Magpies (link in supplier page), currently the only UK based dealer for Pretty Serious.  I got my bottle of OPI basecoat gratis, thanks to my lovely mum who gave me it.  Thanks mum!

Tuesday, 28 January 2014

Muir Muir by OPI

Hello ladies :) Today's mani post is 'Muir Muir' by OPI from their San Francisco Fall 2013 collection.  This is another polish that made it onto a lot of bloggers 'Best Of 2013' lists so I was eager to try it.  I don't actually own this one, my mum does, so I painted my nails at her house and grabbed a pic on my camera phone so apologies for the crappy quality...

Pictured here are two coats with NE base and SV topper.  Photographed in natural indirect lighting - which is important because I think most people's swatches are in artificial lighting which as we all know can make a polish look fancier than it will look on nail 90% of the time.

Muir Muir by OPI - natural indirect lighting
This polish was an overwhelming 'meh' for me.  As this swatch shows, most of the time this just looked brown - and although brown can be fabulous (hello 'Germanicure') this one is just a dusty forgettable brown for me.  In some lighting you can see the evidence of that warm burgundy undertone that made me think of the likes of Germanicure/Every Month is Oktoberfest when I first saw the swatches, but I can say that this polish is nowhere near as exciting as either of those.

All in all I'm glad I didn't splash out on this one.  In fact I don't own any of the SF collection yet, a lot of them looked like a case of the same ol' same ol' from OPI.  Perhaps they used up all their Fall mojo on the incredible 2012 Germany collection?

Wednesday, 15 January 2014

OPI 'Germanicure' with Girly Bits 'Shift Happens'

Following my recent dupe test of Girly Bits Shift Happens and Max Factor Fantasy Fire (spoiler: I think they are dupes) I promised to show you the mani I did that used the Girly Bits polish....

For this mani I used my usual two coats of OPI Germanicure, and a single coat of Shift Happens on top (with the usual NE base and SV topcoat).  Germanicure is a stunning polish to start with, and like its collection-mate 'Every Month is Oktoberfest' it looks amazing layered (FYI you can find my comparison post of Germanicure, EMIO and Chanel Malice here which also includes pics of EMIO layered with Max Factor Fantasy Fire).

OPI Germanicure and Girly Bits Shift Happens - artificial light
For me the 'Germany' Fall 2012 collection from OPI was the best OPI effort since the now legendary Russian collection of 2007.  Germanicure and EMIO were the stars of the show for me, and I think these pictures show why.  This combination with the Girly Bits topper polish is like autumn in a bottle.  The natural glowing brown-toned shimmer of the Germanicure is given that added va-va-voom by the GB topper which adds russet, gold and green elements to the shimmer.  Like falling autumn leaves on your finger tips.

OPI Germanicure and Girly Bits Shift Happens - artificial light
OPI Germanicure and Girly Bits Shift Happens - artificial light - lovely peeks of green shimmer!
The colour shift of the topper is just gorgeous, and I've tried to capture a wee bit of the range here, from bronzed russet to peeks of green.  Really this is one that has to be seen to be believed, and for me its one of those manis that I just couldn't stop staring at.


OPI Germanicure and Girly Bits Shift Happens - artificial light
OPI Germanicure and Girly Bits Shift Happens - artificial light - warm cinnamon-y russet tones
I'll definitely be rocking this combo again! It's so pretty I won't even wait till autumn to do it either...

I picked up my bottle of Shift Happens from Rainbow Connection UK, and Germanicure from my local John Lewis (although I recommend the marvellously cheap OPI supplier Nail Polish Direct).  See my suppliers page for the links.

Thursday, 4 July 2013

Wimbledon Glam Slam


OPI Glam Slam Wimbledon set - Direct Sunlight
In 2011 Tennis Champion Serena Williams teamed up with OPI to produce a series of two-polish sets, with one set released to coincide with each Grand Slam tournament of that year.  From this "Glam Slam" collection this is the Wimbledon set.  My birthday is really close to Wimbledon, and I love the colour purple, so this set was one of my birthday treats in 2011.  I've worn it for every Wimbledon since!  It's gorgeous....
The set consists of a super sparkly purple shade - "Grape, Set and Match" and a sparkly holo glitter topper called "Servin' Up Sparkle" which contains a mix of tiny circular glitters and larger hex pieces.  The formula on both is really good -  "Grape, Set and Match" has that slightly gritty, dry textured finish that's typical of shades with this amount of sparkle but it goes on really smoothly and dry time is good.  The glitter topcoat is fantastic - really dense, easy to apply, and no fishing for big particles required.


OPI Glam Slam Wimbledon set - Artificial Light
Shown here I'm wearing two coats of "Grape...", one coat of "Servin'...", with one coat each of Nail Envy base and Seche Vite on top.


OPI Glam Slam Wimbledon set - Indirect Sunlight
This is such a fun combination, and great to use individually too.  I find them pretty durable for sparkly polishes...I can easily get through the whole second week of Wimbledon before I feel the need to change it :)

If you're watching the tennis, enjoy! Here's hoping it's Andy's year.....(sparkly fingers crossed)

[for all swatches, click to embiggen]....


Monday, 3 June 2013

Comparison: OPI Germanicure, Every Month is Oktoberfest and Chanel Malice

Today's post is a comparison of some of my absolute favourite polishes from 2012, and actually these might be some of my favourites ever: Chanel Malice, and two from OPI - Germanicure and Every Month is Oktoberfest.  I've been meaning to dupe test these for a while, and you can see from this bottle shot why I thought they'd be pretty similar....

Chanel Malice, OPI Every Month Is Oktoberfest, OPI Germanicure - sunlight
L:R - Chanel Malice, OPI Every Month Is Oktoberfest, OPI Germanicure - sunlight
Malice was the limited edition Christmas release for 2012 from Chanel.  The OPI polishes - Every Month is Oktoberfest (EMIO) and Germanicure are part of the Fall 2012 'Germany' collection.  The Germany collection is my favourite OPI collection since the legendary Russia Fall collection in 2007.  I'm definately a Fall/Winter shades kind of girl, I much prefer vampy juicy Fall colours to insipid Spring pastels and these three polishes are right up my alley.

There is significant debate online about the similarity between the two OPI shades.  Germanicure has also been touted as a dupe for the HTF Malice.  So...on with the comparison!


Chanel Malice, OPI Every Month Is Oktoberfest, OPI Germanicure - sunlight
Chanel Malice (index finger), OPI Every Month Is Oktoberfest (middle), OPI Germanicure (ring finger) - sunlight
Immediately you can see that these couldn't be more different.  Malice is a lush blackened burgandy with incredible shimmer, EMOI has an inky violet base with golden fiery shimmer and Germanicure has a dusky brown base with golden fiery shimmer.  The in-bottle similarity of the OPI's I think is because the shimmer particles look the same to me, and its the base colour that differs.

Chanel Malice, OPI Every Month Is Oktoberfest, OPI Germanicure - articifial light
Chanel Malice (index), OPI Every Month Is Oktoberfest (middle), OPI Germanicure (ring) - articifial light
Pictured here I'm wearing one coat of Nail Envy as base, and two coats of each colour, with no top coat.  These polishes are beautifully glossy on their own.  The formula on the Chanel is incredible, this is pretty much a one-coater its so pigmented, but I'm a habitual two coater regardless.  No streaks, perfect leveling, top marks.  The OPI's are both pretty streaky on the first coat, but the second sorts that out completely for a smooth finish.

For giggles I then layered these with another firm favourite from 2012 - Fantasy Fire by Max Factor.  This is the ultimate layering polish - its too sheer to be much use on its own (it took 5 coats to get the in-bottle colour on my nails).  It's a violet base with pink, purple and gold shimmer particles.  So it layers brilliantly with any colour that has any of those three colours as a base....

Chanel Malice, OPI Every Month Is Oktoberfest, OPI Germanicure - layered with Fantasy Fire - sunlight
Chanel Malice (index), OPI Every Month Is Oktoberfest (middle), OPI Germanicure (ring) - all layered with one coat of Max Factor Fantasy Fire - sunlight
Phwoar! As if any of these shades needed something extra, the Fantasy Fire just gives these an extra edge of sparkle. 

For my manicure this week I picked my favourite and painted the rest to match: OPI EMOI with Fantasy Fire...love it! This is the fourth time I've used EMOI since I got it, which makes it officially my most used 2012 polish.  It's like they designed this one with me in mind.  Can't wait to see what OPI brings out this Fall!

Nail Envy (1 coat), OPI EMOI (2 coats), Max Factor Fantasy Fire (1 coat) and Seche Vite (1 coat)
OPI Every Month Is Oktoberfest - layered with Fantasy Fire - sunlight


OPI Every Month Is Oktoberfest - layered with Fantasy Fire - sunlight
OPI Every Month Is Oktoberfest - layered with Fantasy Fire - indirect sunlight
What were your favourite polishes of 2012? Do you wear Fall shades all year round or are you a seasonal girl?